GS1 Sunrise 2027: A 2D Barcode Readiness Checklist for Packaging Teams



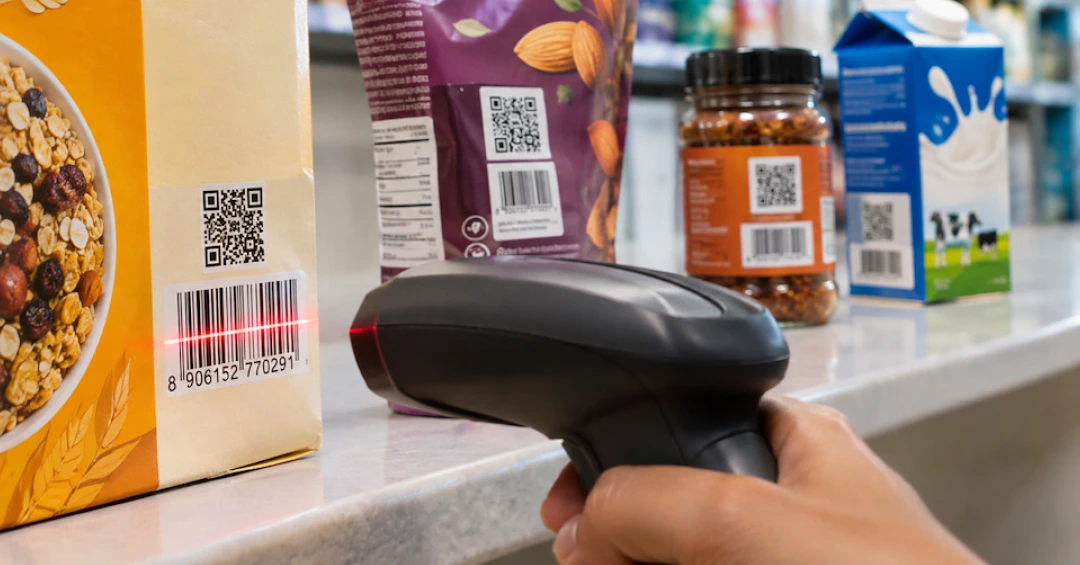
You can put a QR code on a packaging design, scan it with your phone and assume everything is working fine. But will it scan just as easily at a retail checkout?
That's something brands need to think about as retailers prepare for GS1 Sunrise 2027. Adding a 2D barcode to packaging isn't simply about placing a QR code on the artwork. The code needs to meet specific requirements for size, placement, color, and print quality.
And these checks involve more than just the designer. The product data needs to be right, the barcode needs to fit the packaging, and the final printed version needs to work as expected.
So, what exactly should packaging and artwork teams be looking for? Let's break it down.
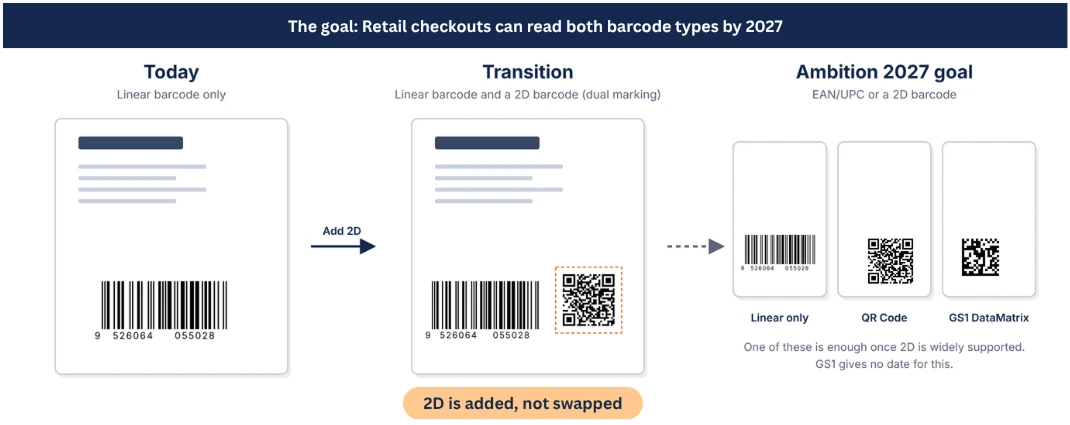
You've probably heard about the move towards 2D barcodes. GS1 Sunrise 2027 is the industry's effort to get retail checkouts ready to read both traditional linear barcodes and 2D barcodes by the end of 2027. The aim is to let retailers capture a product's GTIN (Global Trade Item Number) from either type of barcode.
But does this mean brands need to replace every existing barcode with a QR code by 2027? Not quite.
The transition is not an immediate replacement of linear barcodes. If you add a 2D barcode, it needs to sit alongside the existing linear barcode, not replace it.
There's also a 90% threshold to consider. GS1's guideline says that linear barcodes will continue to be needed until 90% of checkout scanning solutions can read GS1-compliant 2D barcodes and capture at least the GTIN. GS1 hasn't specified when this threshold will be reached.
Not every checkout is ready to process 2D barcodes yet, either. So, before making changes to your packaging, check what your retail partners currently accept. Some packaging formats may not even have enough space for both barcodes. GS1 says these packs may need to wait until the linear barcode is no longer required.
So, for now, brands need to start preparing, but there's no need to rush into redesigning every pack without first understanding the requirements.
This is probably one of the first decisions your packaging team will need to make.
GS1 allows three 2D barcode types for retail checkout. While they may look similar at first glance, they differ in how they store information, how consumers can scan them and how much space they need.
Here's a quick comparison.
| Barcode | Can consumers scan it using a phone's default camera? | Space required | When to consider it |
|---|---|---|---|
| GS1 Data Matrix | No, needs a specialized app | Smallest | When space is limited and consumer scanning isn't required |
| QR code (GS1 Digital Link) | Yes | Larger | When consumers should also be able to access product information |
| Data Matrix (GS1 Digital Link) | No, needs a specialized app | Small | When you need a web address in a compact code |
Two of these options use something called GS1 Digital Link. In simple terms, it puts the product's GTIN into a web address.
For example:
https://Yumchips.com/01/09526064055028
The number after /01/ is the 14-digit GTIN. This allows the code to serve a purpose at checkout while also connecting consumers to product information.
It depends on a few things:
One more detail worth discussing with your web team: GS1 advises that a Digital Link address should redirect to product information rather than point directly to a specific webpage. Product information and website pages may change at different times, so the address should continue to identify the product even when the webpage changes.
A 2D barcode is made up of small squares. The width of one individual square is called the X-dimension. The clear space around the barcode is known as the quiet zone. This space needs to remain free of printing or other elements.
GS1 specifies the following dimensions for items scanned at general retail POS and not in general distribution:
| Specification | Data Matrix | QR code |
|---|---|---|
| Minimum X-dimension | 0.396 mm | 0.396 mm |
| Target X-dimension | 0.495 mm | 0.495 mm |
| Maximum X-dimension | 0.990 mm | 0.990 mm |
| Quiet zone | 1 square | 4 squares |
| Quiet zone at target size | 0.495 mm | 1.98 mm |
One thing to keep in mind: The dimensions above apply to barcodes scanned at retail checkouts. If the packaging also needs to be scanned at warehouses or distribution centers, different size requirements apply. In that case, the minimum X-dimension is 0.743 mm, with a target of 0.990 mm.
So, check where the barcode needs to be scanned before finalizing its size.
A barcode's size depends on how much information it carries. The more information it needs to store, the more space it may require.
This is particularly important when using GS1 Digital Link. A change to the final web address can affect the barcode's size, which may mean generating it again and adjusting its placement in the artwork.
That's why it's better to confirm the final barcode information before adding it to the artwork. GS1's retail 2D barcode size estimator can help teams plan the space required.
Getting the size right is only half the job. Where you place the barcode matters just as much.
GS1 recommends starting with the lower-right area on the back of the pack. But there are a few more things to check before approving the placement.
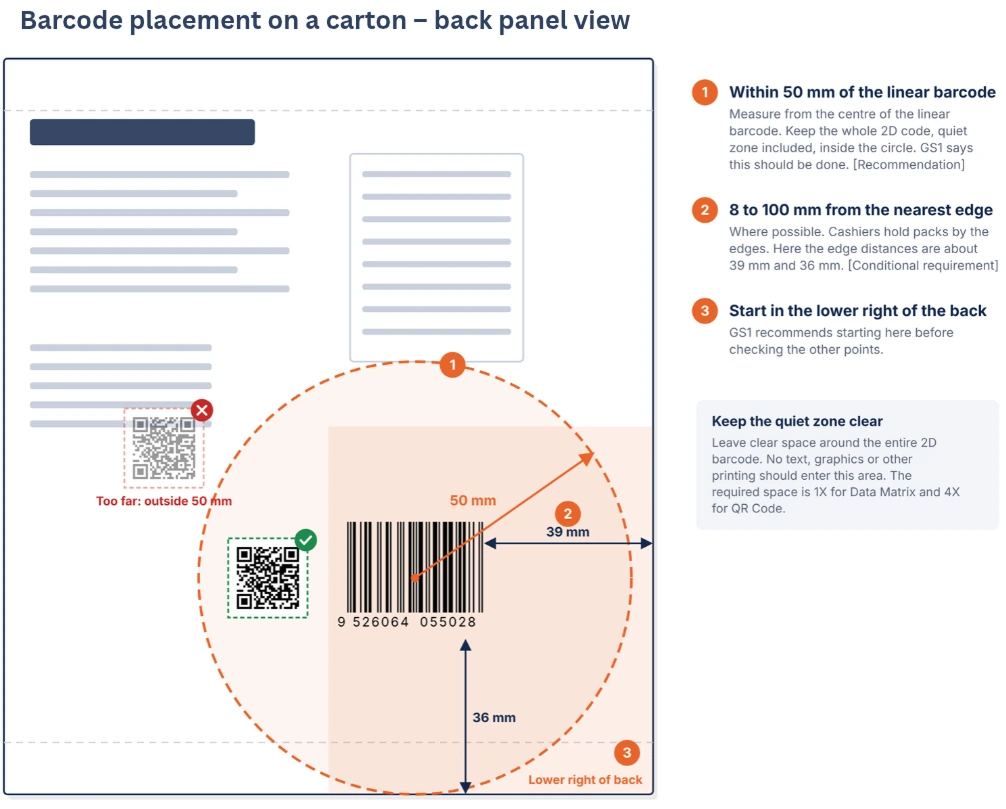
The entire 2D symbol, including its quiet zone, should be within a 50 mm radius of the centre of the linear barcode. This is a recommendation based on GS1's checkout-speed testing. Larger codes on bigger packs may need more space, but the gap should be kept as small as possible.
GS1 recommends keeping the barcode between 8 and 100 mm from the nearest packaging edge, where possible.
Why? Cashiers often hold packs by their edges. If the barcode is placed too close to an edge, it can make scanning more difficult.
This is particularly important when working with cartons, flexible packaging and other irregular surfaces.
GS1 says barcodes and their quiet zones should be kept away from seams, folds, flaps, perforations, die-cuts, ridges, tight curves and rough textures. They should not be placed underneath a flap either. GS1 also states that barcode placement on the neck of a bottle is not allowed.
A linear barcode needs a scan line across it. A 2D barcode needs the entire symbol to be captured. So, if a fold or curve affects even one corner, it can cause scanning problems. This is why it's important to check barcode placement against the dieline, rather than looking at the artwork alone.
A packaging design may already have campaign QR codes, loyalty codes or production-control codes. These need to be considered when adding a checkout barcode.
GS1 recommends keeping consumer-engagement codes away from the checkout barcode because both could be captured together, potentially causing an unintended transaction. Production-control codes should be obscured.
There are also rules for multiple product identifiers. A pack must not carry two different GTINs. On multipacks and over-wraps, inner barcodes must be fully hidden.
If a 2D barcode is placed next to a linear barcode that already displays its number, it doesn't need a separate number underneath.
If the two barcodes cannot be placed next to each other, GS1 says the number should accompany both. If the 2D barcode is the only barcode for the product, it must display (01) followed by the 14-digit GTIN.
These may seem like small details, but they're exactly the kind of things that can get missed when barcode placement is checked only at the final stage.
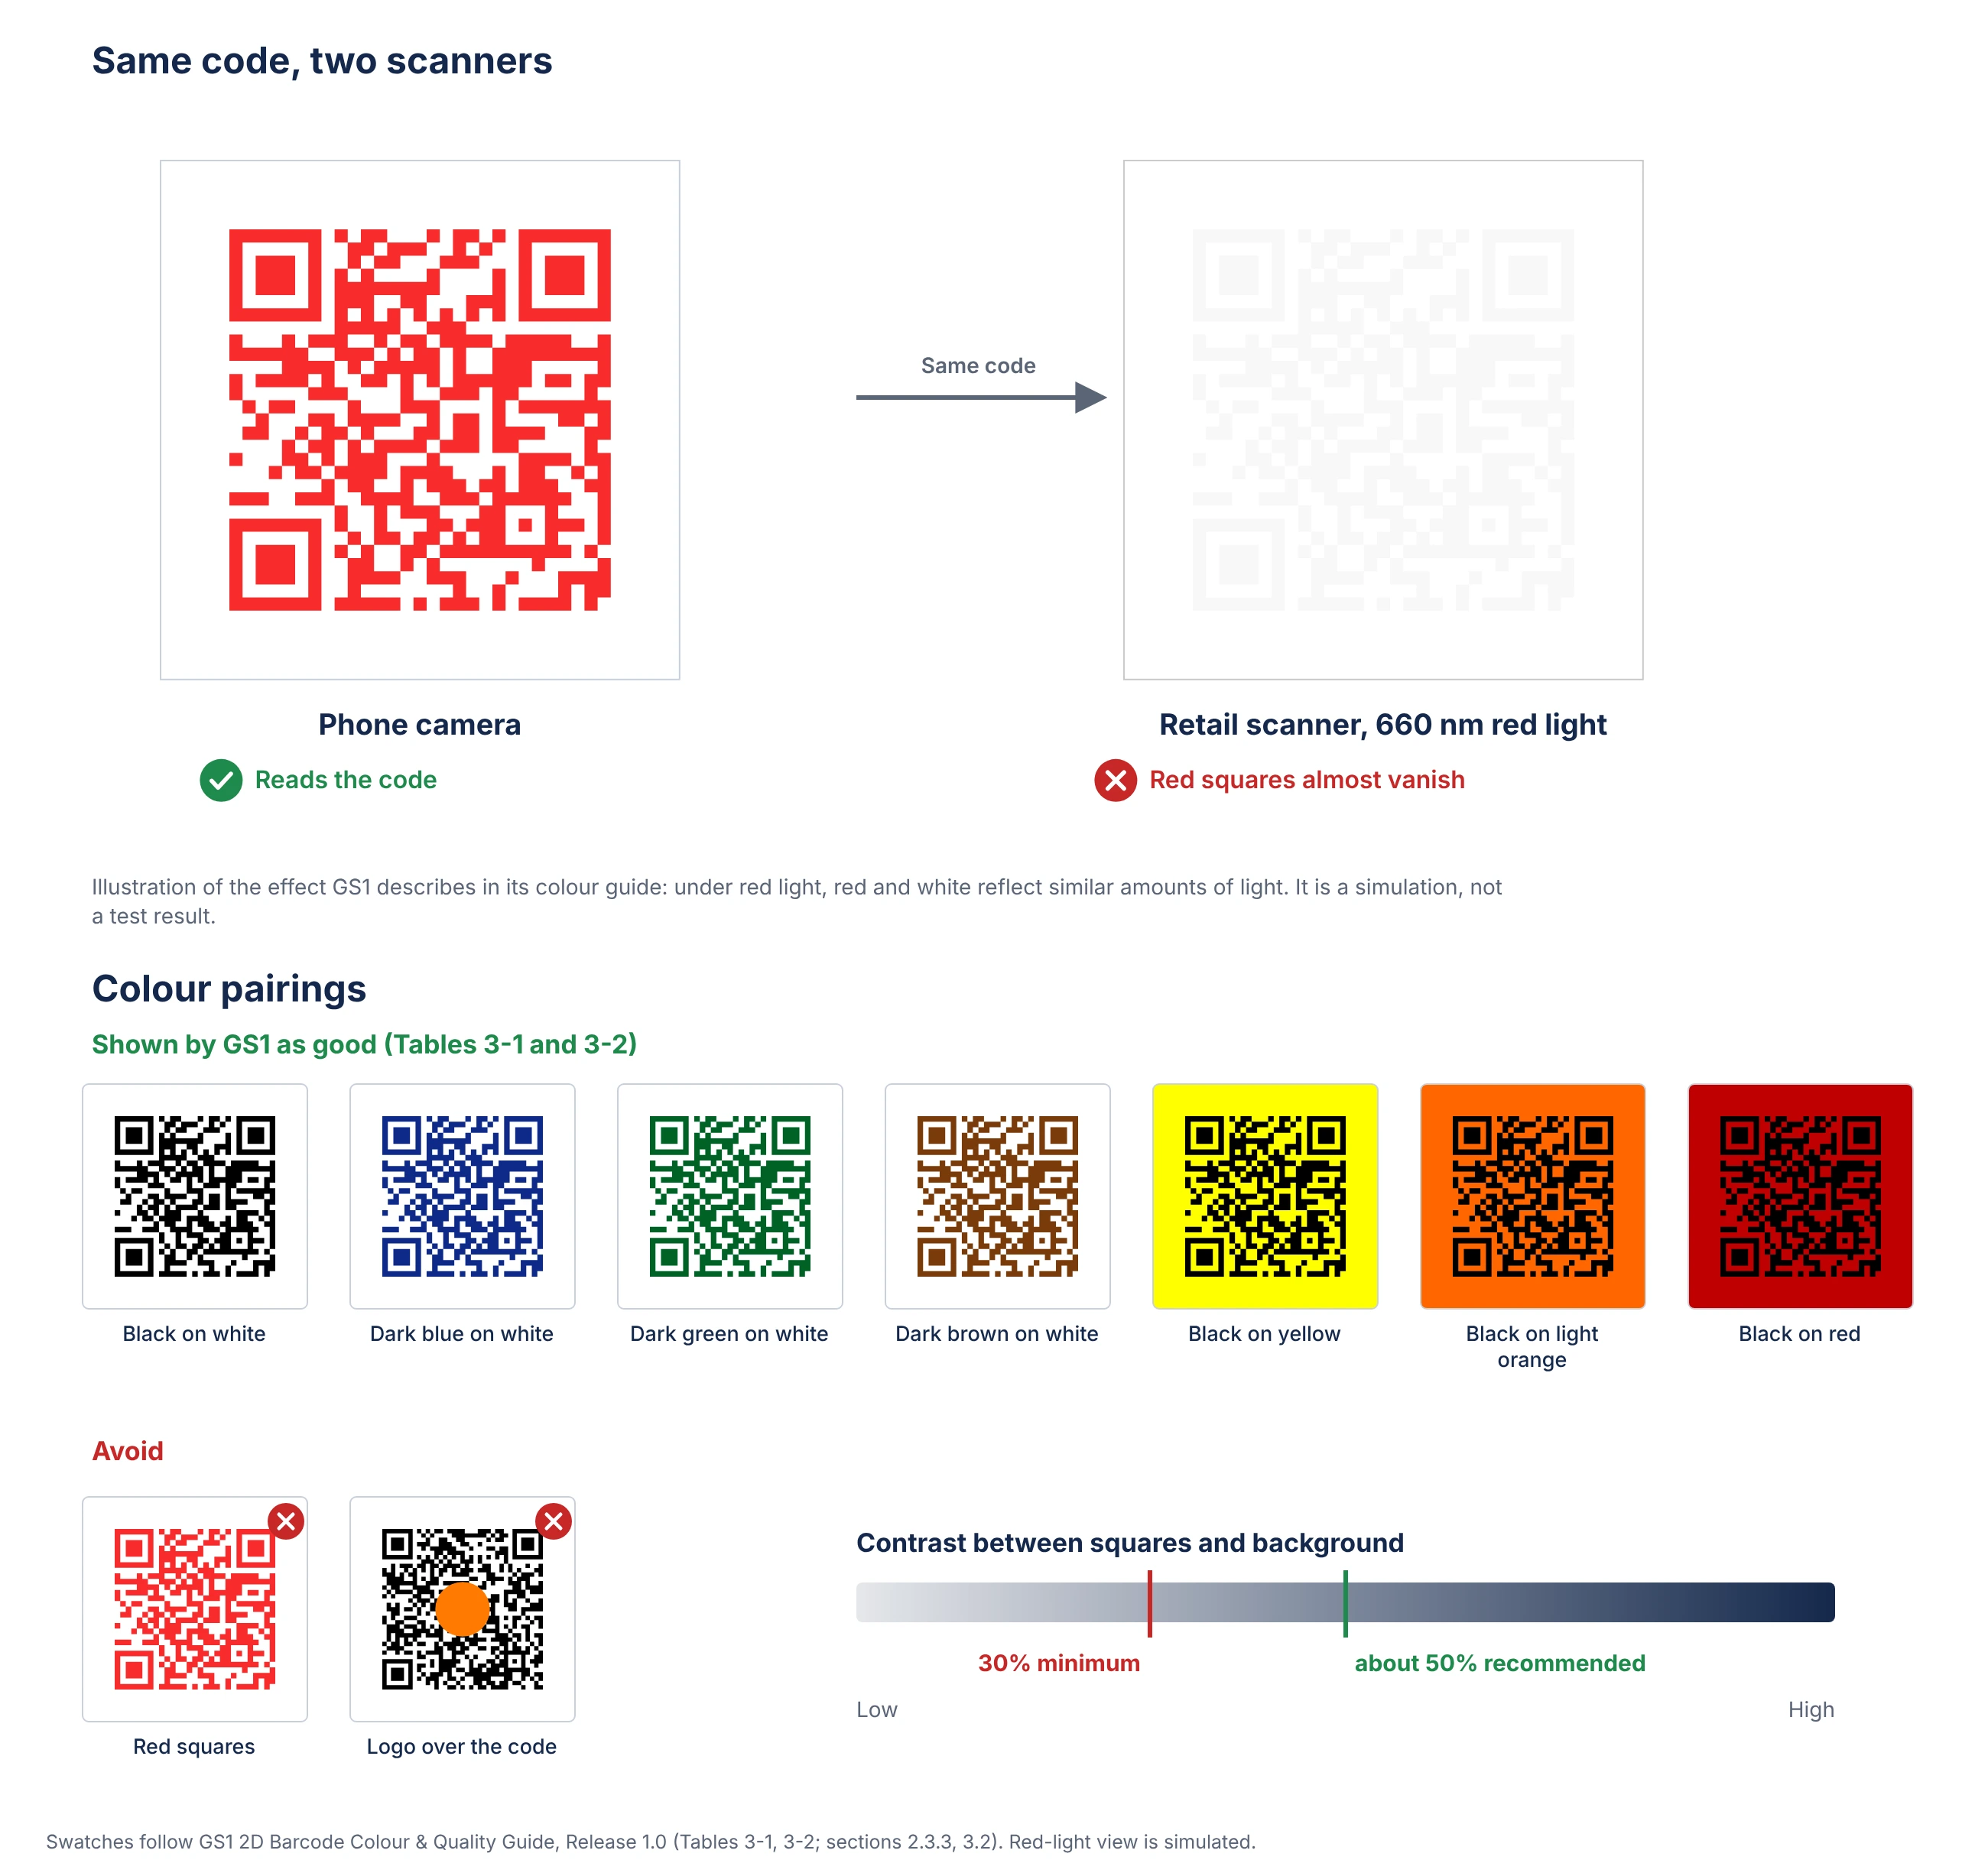
Phone cameras and retail barcode scanners use different scanning methods. Unlike phone cameras, retail scanners use red light (660 nm) and read barcodes through a much smaller aperture (0.30 mm).
This matters when choosing barcode colors. Under red light, red and white surfaces can reflect similar amounts of light, making red squares difficult for retail scanners to distinguish.
Selecting the right barcode, confirming its data and checking its placement are important. But before sending the artwork for printing, there are four checks to complete.
Check the barcode in the artwork file. Is it the correct symbol? Does it contain the right information? Are its dimensions within the applicable range, and is the quiet zone clear? Decode the file and check its dimensions rather than relying on how it looks on screen.
Check the barcode against the packaging dieline. Make sure it follows GS1's placement guidance and is clear of folds, seams and other packaging elements.
The barcode must also be checked on a printed proof using the actual substrate and printing process. GS1's minimum quality grade for retail 2D barcodes is 1.5/12/660.
Here's what that means:
The verifier checks print-quality factors such as contrast, modulation, symbol uniformity, damage to fixed patterns and print growth.
GS1 highly recommends verification. A PDF alone cannot establish how the barcode will perform once printed.
Finally, check that the printed barcode decodes to the approved product information. If it contains a Digital Link address, open it to confirm that the link works correctly.
This is an additional recommended check, but an important one. A barcode that prints correctly can still cause problems if it carries incorrect product information.
A barcode gets touched at three points: when the artwork is created, when each revision comes back, and when the printed proof arrives. Each point can introduce a different error, so each needs its own check.
On the artwork file. Barcode Analysis in Proofing & Compare inspects 1D and 2D barcodes and verifies their accuracy against international standards. This is the artwork validation check, done on the file before it goes anywhere.
On every revision. Image comparison highlights differences in barcodes between artwork versions. A barcode that moved or changed in a late edit shows up in the comparison, so catching it doesn’t depend on a reviewer noticing.
On the printed proof. Proofing & Compare measures and grades the quality of a printed barcode to ISO/IEC standards. Print Inspection verifies barcodes, text, graphics and braille on the printed proof against regulatory and brand standards.
All three checks run in the platform where the artwork is reviewed and approved, so barcode verification is part of the review itself and not a separate step.
Use this checklist during artwork approval and when reviewing the printed proof.
| What to check |
|---|
| 1. Barcode type: Is it accepted by the retail partner? If a 2D barcode is added, is the linear barcode retained? |
| 2. Barcode data: Do the barcodes carry matching GTINs and information? Is the final Digital Link address used? |
| 3. Size and clear space: Is the barcode within the required size range, with enough clear space around it? |
| 4. Placement: Is the entire 2D barcode, including its quiet zone, within a 50 mm radius of the linear barcode's center? |
| 5. Position on pack: Is it away from seams, folds, flaps, die-cuts and curved areas? Is it kept off the bottle neck? |
| 6. Other barcodes: Does the pack carry only one GTIN? Are inner barcodes on multipacks properly hidden? |
| 7. Human-readable information: Is the correct number displayed below the barcode, where required? |
| 8. Color and contrast: Is there enough contrast? Are red dark modules, logos and shiny surfaces avoided? |
| 9. Print quality: Has the printed barcode been verified against the required 1.5/12/660 grade? |
| 10. Scan and data check: Does the printed barcode scan correctly, show the approved data and open the right link? |
Getting one barcode right is one thing. Making sure the same checks happen across hundreds of SKUs is a different challenge.
Different products, packaging formats, barcode data and teams can make the process difficult to manage. A change to one barcode address could even mean revisiting multiple artworks. That's why it's important to have a clear process for managing barcode-related changes, reviews and approvals.
An artwork management workflow can help teams coordinate reviews, manage artwork versions and keep approval records in one place. Barcode measurements and print verification, however, still need to be handled using the appropriate tools.
As Sunrise 2027 approaches, getting these processes in place can help packaging teams manage the transition across their product ranges.

No. During the transition, the 2D barcode is added alongside the existing linear barcode. GS1 says linear barcodes will continue to coexist with 2D barcodes for as long as there are uses for them.
No. It is an industry goal for retail checkout systems. GS1 US says brands don't need to adopt every 2D capability by the end of 2027. However, individual retailers may have their own requirements, so check with your retail partners.
GS1 highly recommends barcode verification and considers it critical for modified codes. The required minimum grade for retail 2D barcodes is 1.5/12/660. A barcode verifier helps establish whether the printed code meets this specification. Your printer or a barcode verification service may be able to carry out the test.